# Verra Redd+ VM0007 Policy Guide
On this page you'll find:
* [Policy Description](#policy-description)
* [Workflow Description](#workflow-description)
* [Policy Guide](#policy-guide)
**For more Verra Redd+ VM0007 policy information, please visit the Envision Blockchain-contributed open-source Guardian policy page** [**here**](https://github.com/hashgraph/guardian/tree/main/Demo%20Artifacts/Verra/Verra%20Redd/VM0007)
## **Policy Description**:
This policy supports the tokenization of carbon offsets, specifically Verified Carbon Units (VCUs) in accordance with Verra’s Verified Carbon Standard (VCS), and specifically, the VM0007 REDD+ Methodology Framework (REDD+ MF). Verra develops and manages standards that are globally applicable and advance action across a wide range of sectors and activities. The VCS Program is the world’s most widely used voluntary GHG program.
The workflow is designed to reflect the general roles and processes of the VCS program. The VM0007 REDD+ is a dynamic modular methodology, and the specific requirements vary depending on the specific project activities and context. The schema was designed to capture the monitoring parameters required for the Avoiding Planned Deforestation (ADP) project type. Projects that involve other project types, and specific contexts, such as projects that involve harvesting commercial timber, may have additional parameters and MRV requirements.
## **Workflow Description**:
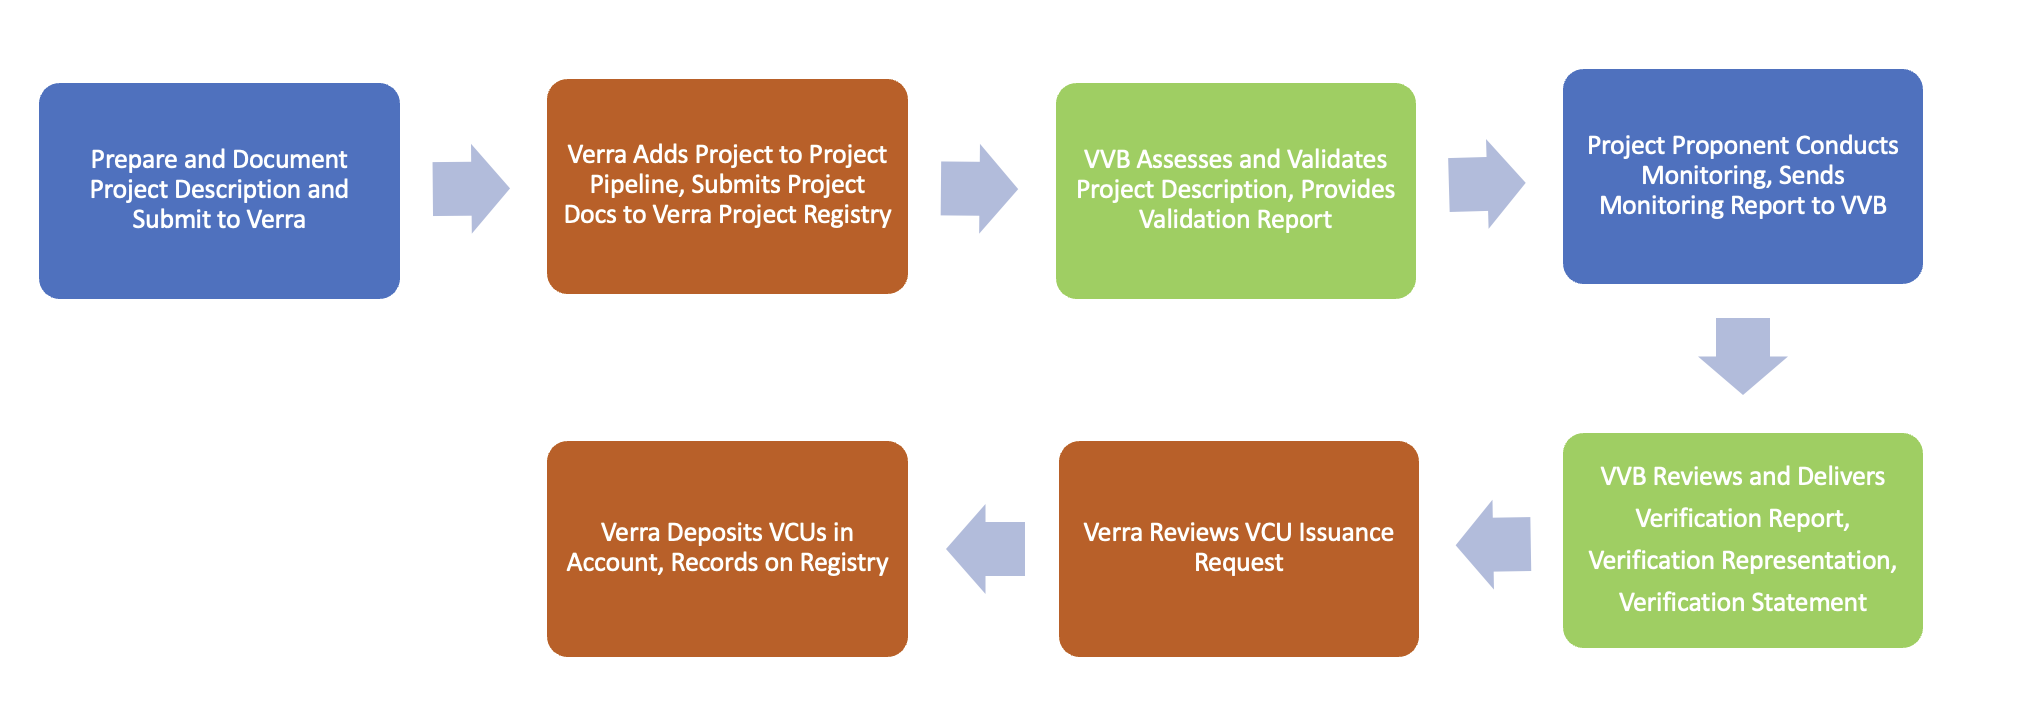
The workflow begins with the Project Proponent submitting the project description (PD) to Verra. The project description will include ex-ante estimates of the monitoring parameters, as well as other project details to demonstrate alignment with the VCS program requirements. Verra then adds the PD and project docs to the Project Pipeline and Project Registry. Next, the Validation and Verification Body (VVB) will assess and validate the PD and provide a Validation Report. Then the Project Proponent will conduct monitoring and develop a Monitoring Report, replacing the ex-ante estimates with ex-post MRV data and submitting it to the VVB. The VVB then verifies the Monitoring Report and delivers a Verification Report, Verification Representation, and Verification Statement. Finally, Verra reviews the issuance request, and VCUs are issued to the Project Proponent.
In future iterations, the workflow will begin with the Project Proponent completing a questionnaire to determine the appropriate methodology, modules, and MRV requirements. Then branch functionality can enable the automatic creation of context-specific schemas.
Roles in the below Workflow Diagram are represented as follows: Project Proponent (Blue), Verra (Orange), VVB (Green)
## Policy Guide
Typically, the way we start the demonstration is by logging in as Verra (Standard Registry). Create a Standard Registry user with the name Verra.
You'll now be prompted to configure your Verra account. Enter the details and then press the Generate button to generate a Hedera Operator ID and an Operator Key and enter the name of your Standard Registry. Press Connect when finished. This will now create Hedera Consensus Service Topics, fill the account with test hBar, create a DID document, create a Verifiable Credential, etc.
Now we will be creating the Policy. We have three ways to "create policies." The first way is to actually create the policy from scratch. The second way is to import an existing policy. The second way is to import an existing policy. When you import a policy, all schemas and tokens that are required in the policy are automatically populated. To do this, you can use the sample policy that we have already uploaded to IPFS. Click on the import button and Hedera message IDs:
{% hint style="info" %}
Even though it is not shown in the screenshots, the third way is to select the policy from the policy drop-down list.
{% endhint %}
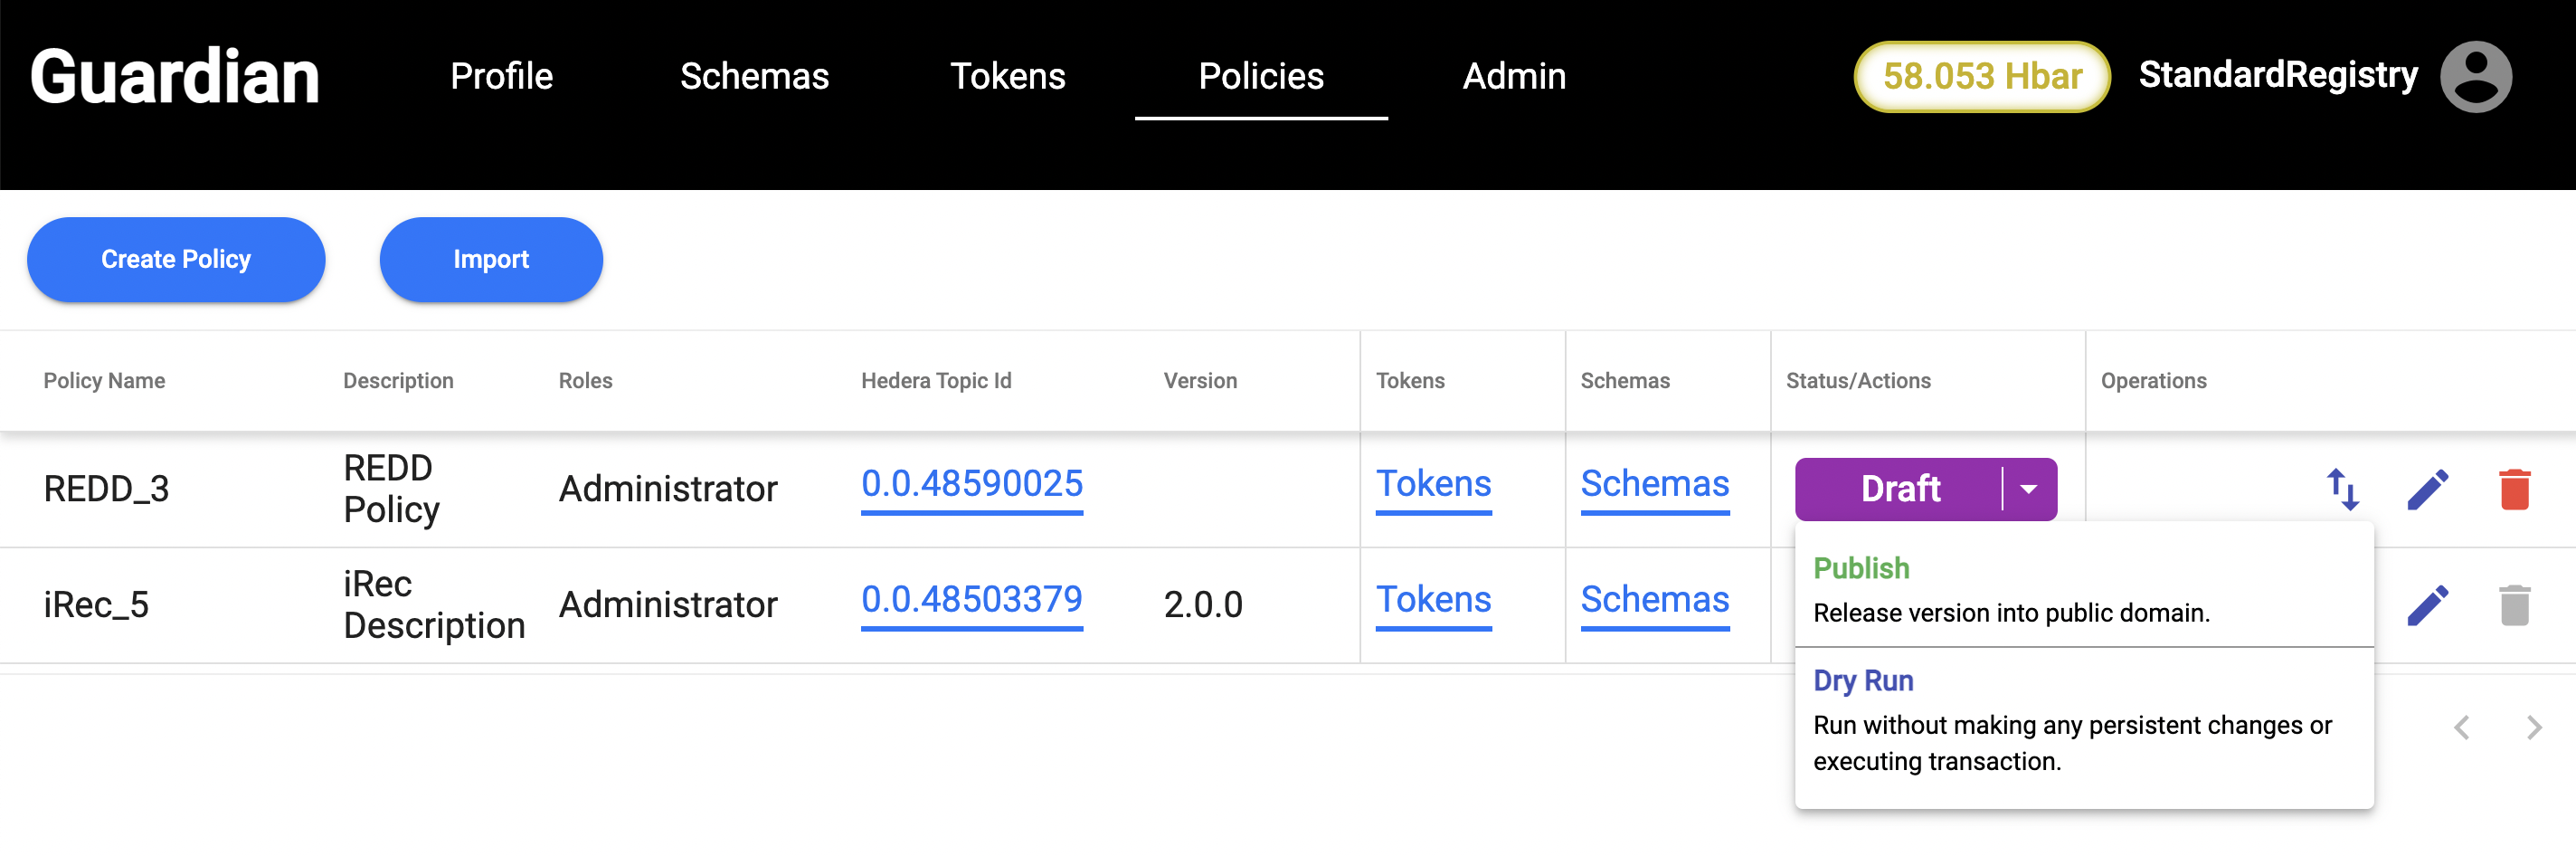
Once the Policy is imported successfully, you get two options: Publish and Dry Run mode.
We select publish option to publish the Policy to the Hedera network.
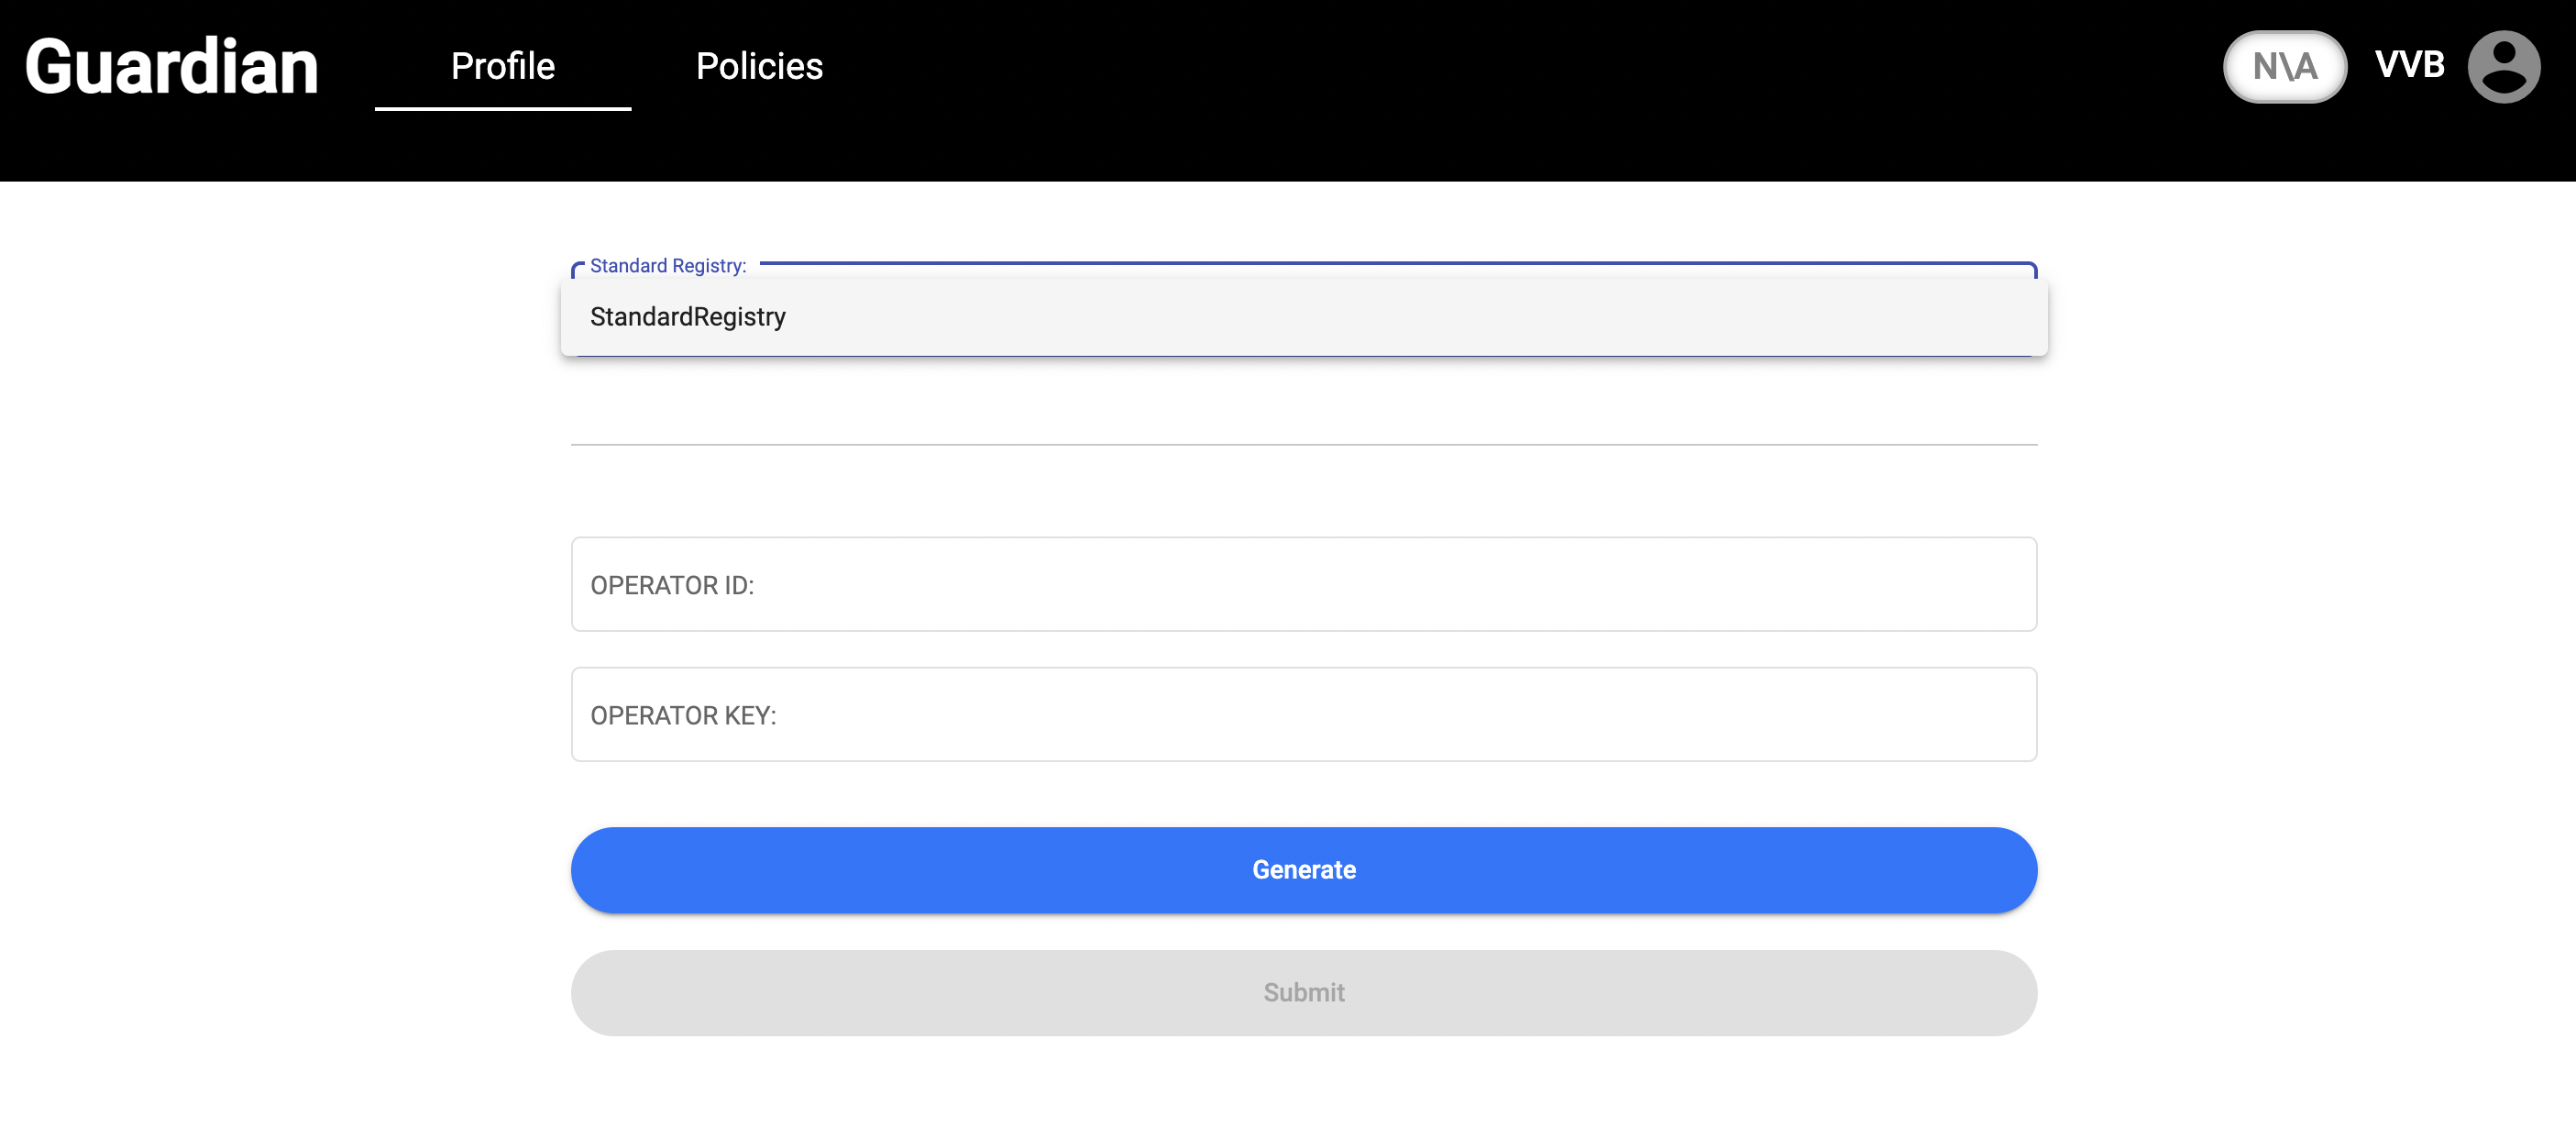
Click on the Standard Registry profile icon and select "Log Out." We will create a user called a VVB (Verification and Validation Body). Once that user is created, we can log in and select the Standard Registry we created earlier in the dropdown. Also, generate the Operator ID and Operator Key and press submit.
Now, we can click on the Policies tab. This is where the specific actions required by the Policy Workflow will be found. We can click the Go button.
We have the option to create a group or accept an invite. In this case, we create a new group by selecting the VVBs group from the dropdown and adding a Group label as shown below:
Once the group is created, we need to create the VVB by entering the VVB name.
Once, the VVB name is submitted, it's waiting for approval.
Now, we log out as the VVB and log in as Standard Registry and review the document and approve VVB by clicking on Approve button.
Now we need to create another user called a Project Proponent and repeat the same steps as Step 5 and Step 6.
Now, we select Project Proponent from the drop-down in the Group and also enter the Group label as shown below.
After creating the group, we will see the New Project button. When we click on the button, we get a form, where complete project details need to be added. We have uploaded a [Sample test data](https://github.com/hashgraph/guardian/blob/main/Demo%20Artifacts/REDD%20APD%20Schema%20Design%20Template.xlsx) file in the open-source Guardian repo.
The next step of our flow is to log out and sign back in as the Standard Registry. Navigate to the Policies tab and click the Open button on the far right. Here you will find the approval actions based on our Policy Workflow required by Verra. You will be able to view the Verifiable Credential prior to approval by selecting the View Document link. Once you are ready to approve the project details, you can click on the Add button.
Now, we log in as Project Proponent and select VVB from the dropdown of the Assign column for Validating the project details.
The next step of our flow is to log out and sign back in as the VVB. We click on the Members tab in the Policy and click on the Get Invite button to create an invitation link. This invitation link is created to create a VVB member.
Now, we create a new user as VVBNew and paste the link under accept invitation section as shown below:
Once clicked on OK in the above screen, we now have the option to sign/ decline the Project. For demo purposes, we click on the Sign button to validate the Project.
{% hint style="info" %}
Note: If there is more than one VVB, we need at least 70% consensus to get the finalized decision on the Project to proceed.
{% endhint %}
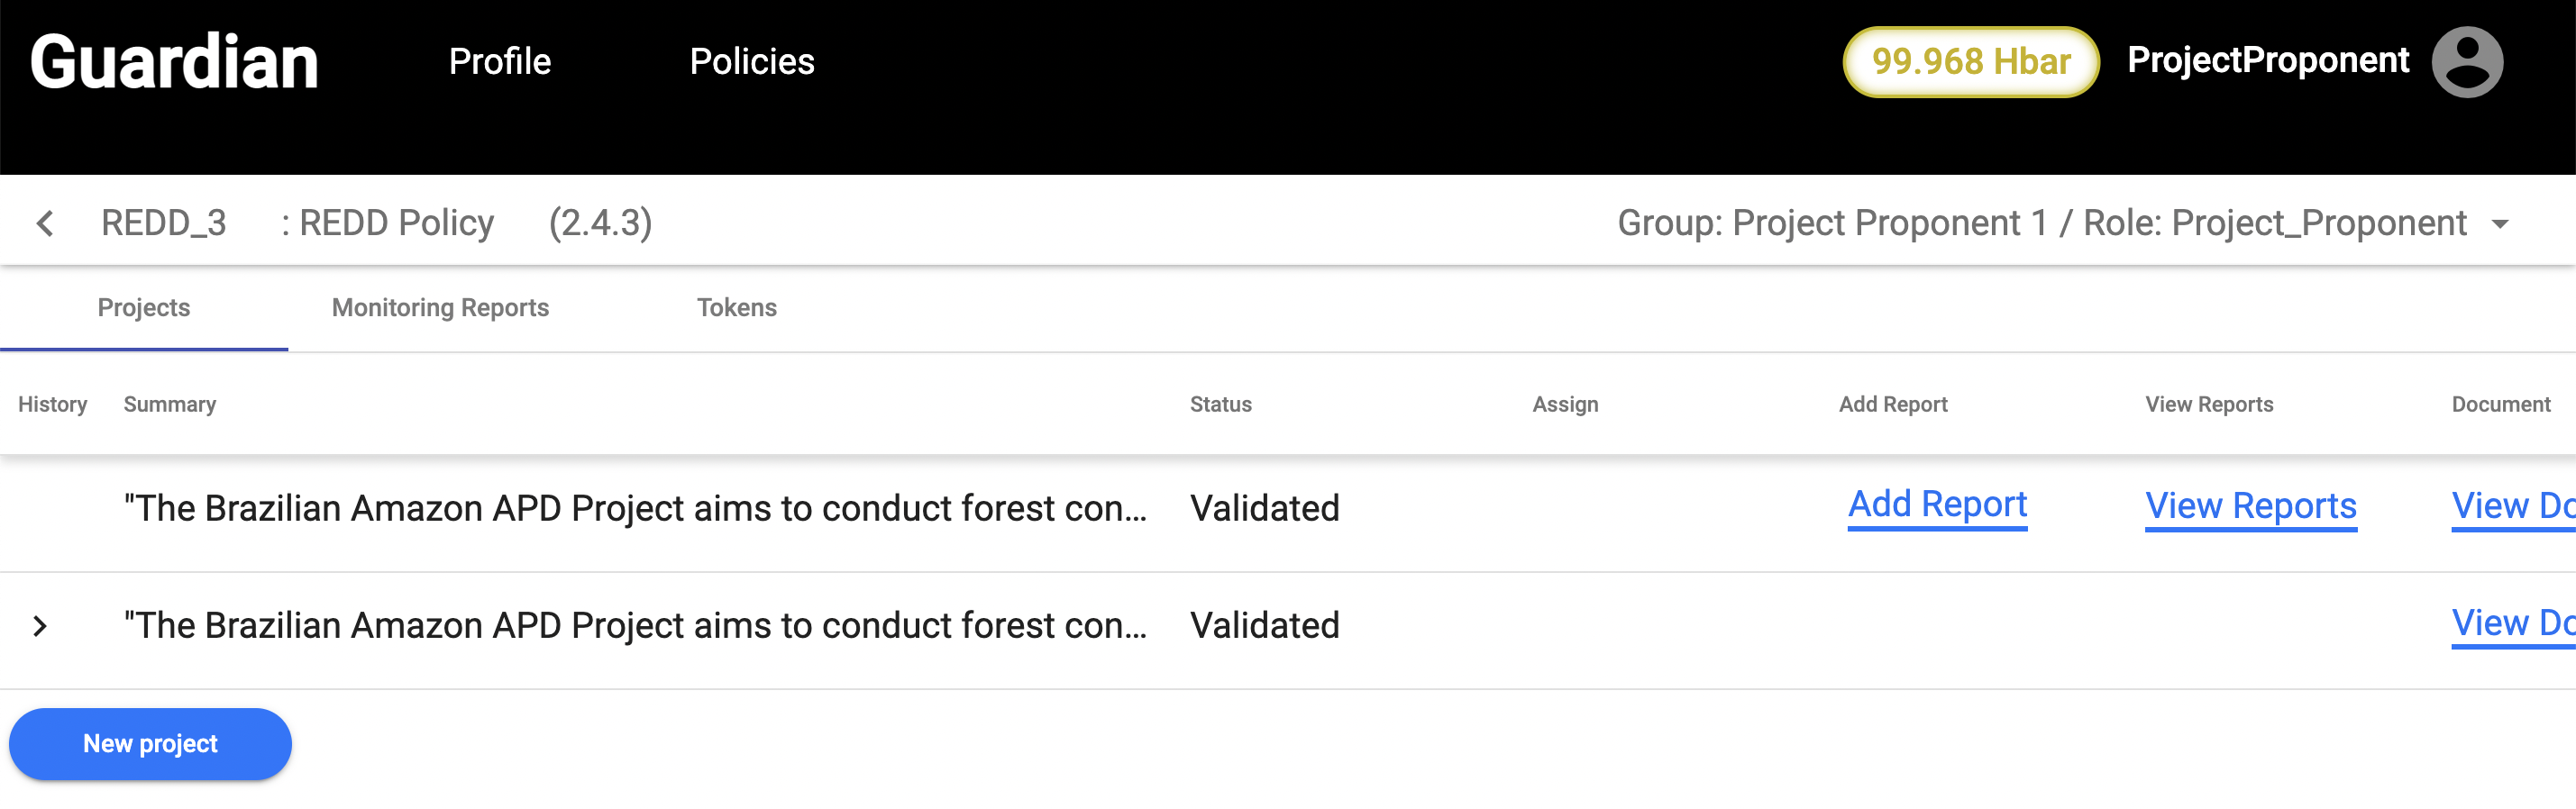
Once the Project is validated, we log out as VVB and log in as Project Proponent. Monitoring Report details should be added by clicking on Add Report
Now, you log out and log in to VVBNew. You will be able to view the Verifiable Credential by selecting the View Document button. Once, you are ready to verify the monitoring report details, you can click on the Sign button.
Once, Monitoring report is verified, you log out as VVBNew and log in as Standard Registry. Navigate to the Policies tab and click the Open button on the far right. You will be able to see Monitoring Reports tab, where you have the option to click on the Mint button.
Once the Minting process is completed, navigate to the Token History tab, where you have an option of viewing TrustChain. You can view TrustChain by clicking on the View TrustChain button.
The Trust Chain view displays essential elements that can be publicly discovered. Elements include token information, Policy information, and all the essential information regarding the Verifiable Credentials that make up the Verifiable Presentation. You will notice "Cards" at the bottom of the screen. Those cards are Verifiable Credentials displayed in chronological order.